
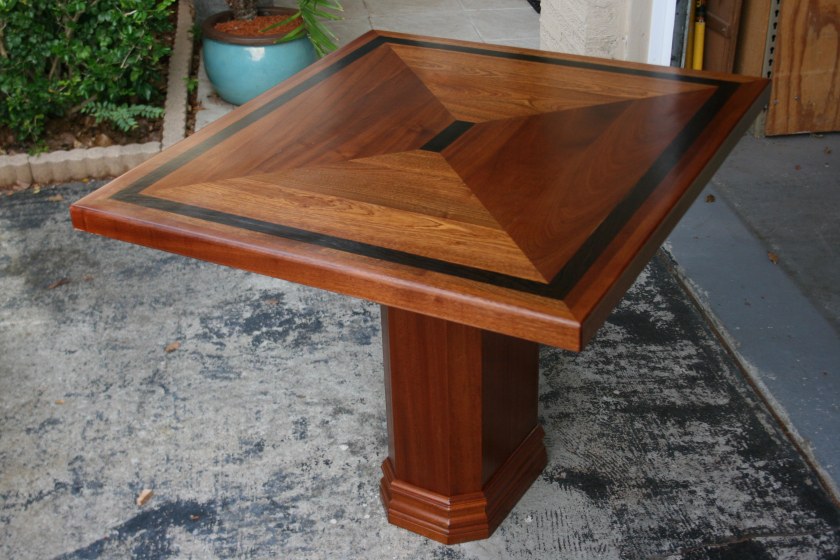
Above is the new galley table I built for my sailboat. The original was ugly, and I was always hitting my knees and feet against the pedestal trying to get in or out of the tight sitting area. I have photos of how I built it, so I thought I would show you a bit of the carpenter in David Alexander.
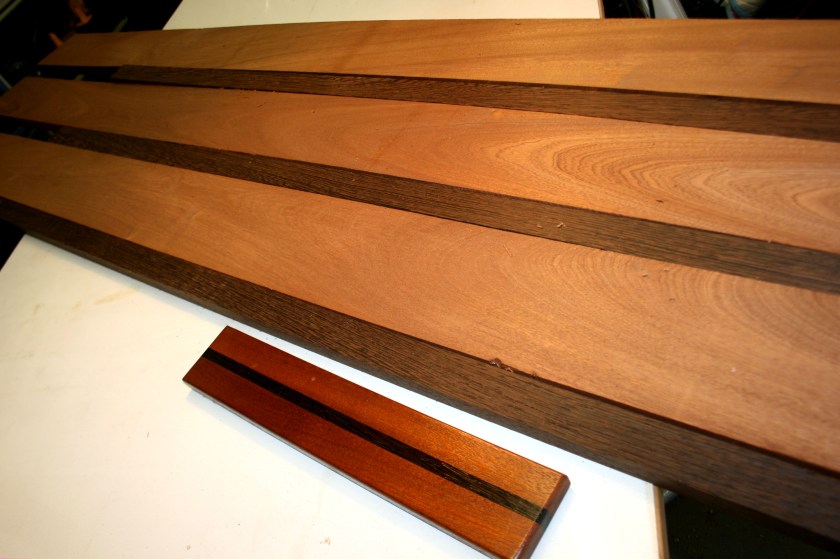
I planed down an adequate supply of Sepele and Wenge that I had been hiding on my shelves. I applied a coat of polyurethane to see the color on a test piece. I cut a piece of teak plywood to the size required to drop between the seating, allowing me to have a third sleeping area on this sailboat. In the future, I found that this area had better ventilation and made a much larger bed. It became the TV pit since I had a large flat panel TV on the opposing wall.
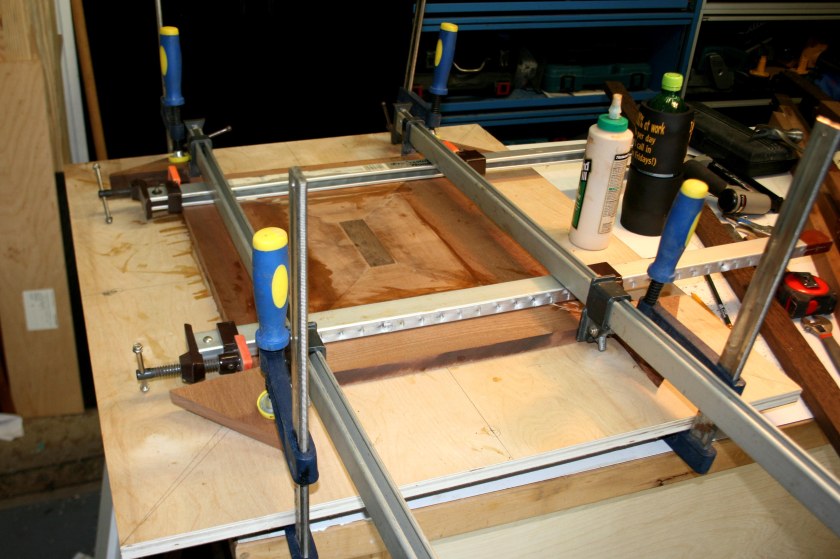

Using Titebond III glue, I started by doing my layout on the plywood, started in the center, and worked my way out, using a pin nailer to secure the pieces to the plywood. The surface and all contact points were secured with glue. Each ring of wood was allowed to dry before the next ring was added.
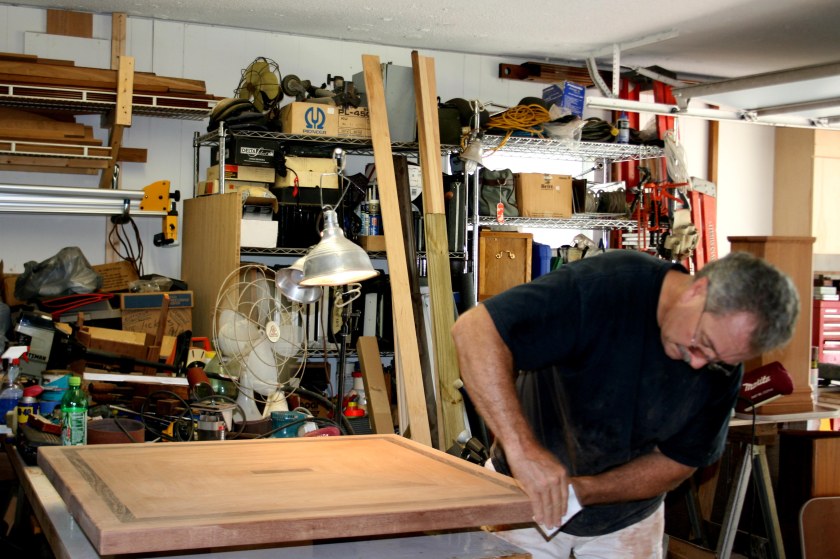

I did this project in my garage. The music was loud, the Heineken was cold, and the fans were blowing on a hot Florida afternoon. As you can see from the above photo. the wood hides its beauty at this stage.


I thinned the first coat as a sealer and sanded it to a glassy smooth. Sepele is easy to work with but Wenge requires control and patience. It works like stringy oak and will blow apart if your router moves too fast. The end results are worth it. I plan to build my new office out of Wenge. After several more coats of finish, sanding between each coat, it produced the table in my boat.

A pedestal? I still have Sepele on the workbench. I have an idea! I cut the angles into the Sepele and glued all but one side with Titebond III. I added Sepele trim pieces to the top and bottom after cutting the pedestal to my required height.


The top and bottom plywood pieces are identical size with rubber T-edge, as edgebanding.
In the end, the height of the rubber edging, when the pedestal is laid on its side, is the exact height between the floor and the bottom of the table top, when the table is dropped to seat level. The side cushions fill in and make a comfortable bed with added support under the table top.

The floor and table top have recessed threads on the top and bottom. I found big bolts with rubber coated handles to soften the accidental contact with bare feet. You can barely see the knobs in the following photo.


The pedestal had a hidden door? Many of the islands I visit have issues with piracy. A Mossberg 12GA shotgun with marine-coat, fits right into the pedestals quick release mounts.


If I get much response from this post, I may add an additional page and start posting my many, many, projects. I am, a cabinet-maker too.
#Cabinetry #Cabinet Maker #Woodworking #Carpentry #Carpenter #Sailboat #Boat #Transportation #Refit #Rebuild
